A balanced schedule is not only key to creating more efficiency but also for meeting your schedule optimization goals. What if you could organize staff and provider schedules and appointment types so that both lined up better with your production goals? In other words, what if you could schedule the perfect day?
Using the Dentrix Enterprise Perfect Day scheduling tool can help plan your schedule and create a balance of higher production and lower production procedures. Using the Perfect Day scheduling feature allows you to designate certain areas of the schedule for appointment types such as crowns and implants, and reserve a different block of time for exams and treatments.
You can also assign a provider to each block so that, when you schedule a low production type of procedure during a block of time designated for high production, a warning will pop up, asking you to choose another block of time for that type of procedure.
How To
To Activate Perfect Day Scheduling:
- From the Appointment Book File menu, click Perfect Day Scheduling.
To Set Up a Time Block in the Appointment Book
- From the Appointment Book Setup menu, click Provider Setup….
- Select a Clinic.
- Select a provider and click Setup. If the provider you want to assign the time block to is not listed, click Add Provider.
- Under Set Time Blocks, click Add. Add providers and color time blocks to the schedule.
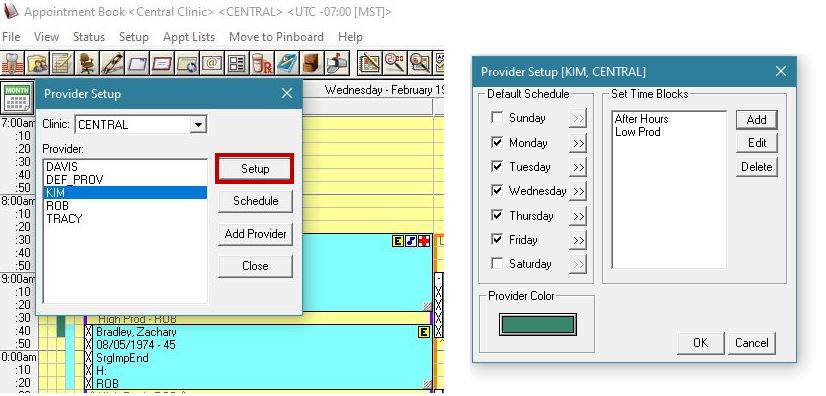
Note: Dentrix Enterprise allows four different block types: General, High Production, Medium Production, and Low Production.
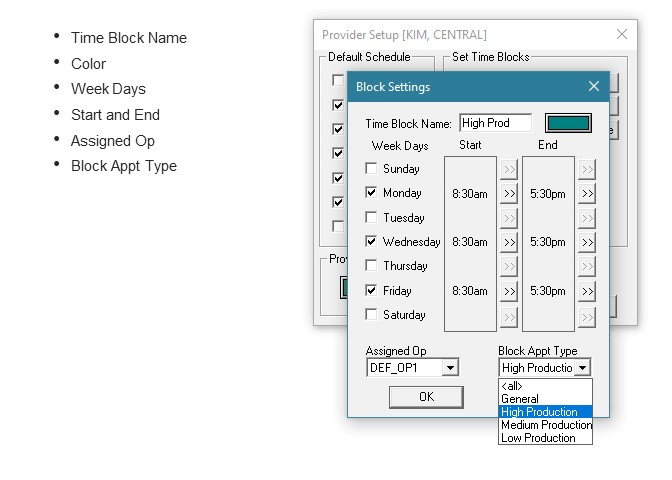
- In the Block Settings window, select the following options:
- In the Appointment Book, Dentrix Enterprise displays a colored border around each of the defined provider blocks.
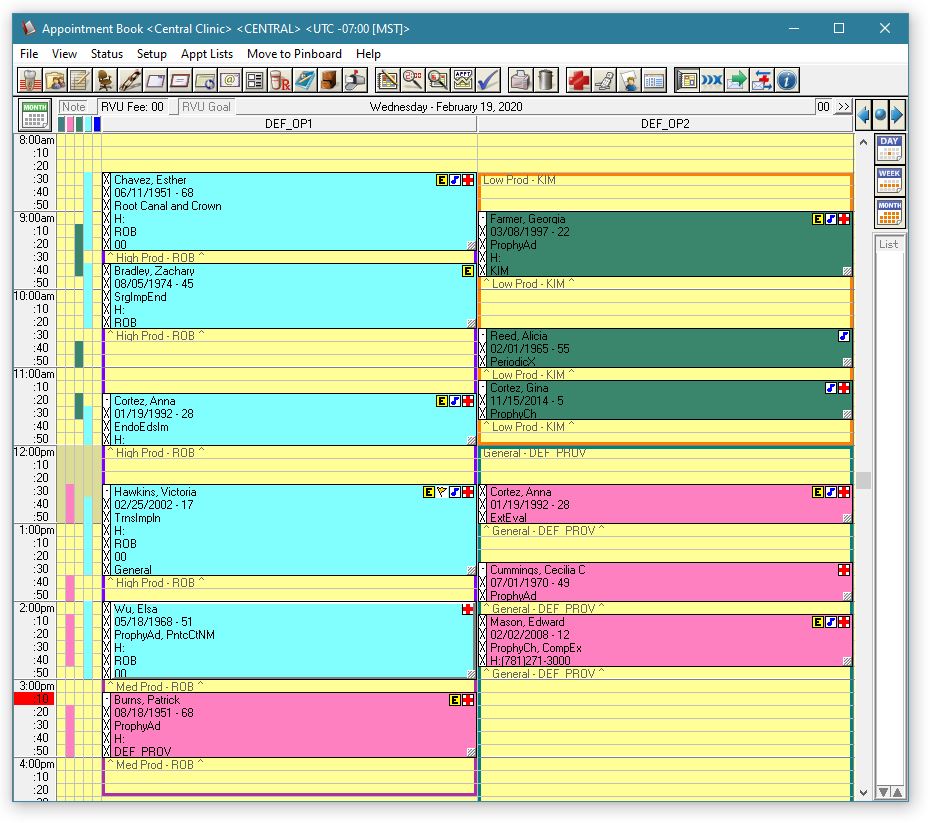
When scheduling an appointment in a defined block of time, Dentrix Enterprise will check both the provider and the appointment type to verify that both are allowed for that time block.
Additional Information
- To reserve specific times in the Appointment Book for certain appointment types, see the Setting up Perfect Day Scheduling time blocks Help topic.
- To assign appointment types, see the Customizing appointment types Help topic.
- To locate the first available time block for the type of appointment you want to schedule, see the Finding an available time block


