
Use clinical note templates to keep your clinical notes accurate, thorough, and consistent.
Documenting treatment and exams in order to create a complete clinical record is an important part of each appointment, but creating detailed clinical notes takes time. Using clinical note templates is one way to improve the accuracy and speed of your clinical notes. Creating and using customized templates in your organization means you can record several paragraphs of notes much faster than typing them from scratch.
Using a clinical note template guides you through the process of leaving a clinical note using prompts that help you record comprehensive information while maintaining the consistency, accuracy, and legibility that’s often missing from handwritten notes. In this article, we’ll show you how to create a customized template so you can create the ones you use most often, helping to cut down on time spent entering clinical notes.
How Clinical Note Templates Work
Clinical Note Templates are made up of note text and added prompts. The note text is always the same every time you use that template. The prompts allow for space in the note text where you can enter custom information that can vary for each note.
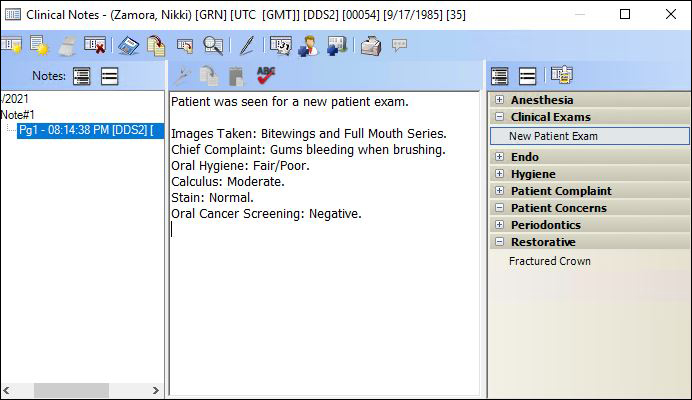
To illustrate how to create a template, let’s begin by looking at some typical new-patient exam notes, which might look something like this:
- Patient was seen for a New Patient Exam
- X-rays: FMX and BWX
- CC: gums bleeding when brushing
- OH: Fair
- Calculus: Moderate
- Stain: Light
- OCS: Neg
It may help to think about clinical note templates according to a 90/10 rule: 90 percent of the information is the same for every new-patient exam–this is work the software can do for you; and usually only about 10 percent of the information varies per patient.
Using Clinical Note templates also eliminates the need for abbreviations, which can be confusing and may mean different things to different people. Now that software can automatically enter the complete word, abbreviations are not necessary, making it easier for people to understand what you mean.
Creating a New Template
Complete the following steps for designing a New Patient Exam template that you can use for clinical notes during every new patient exam.
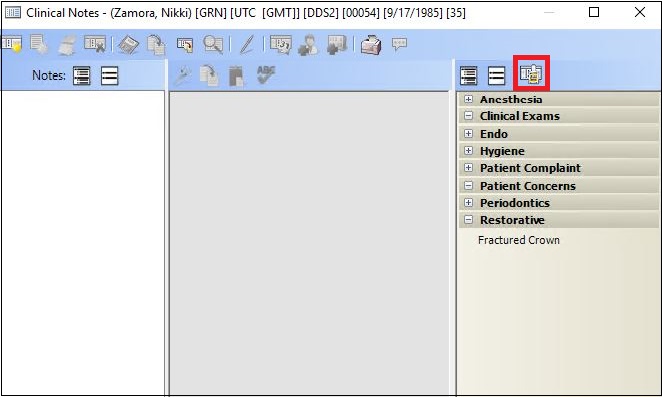
- With a patient selected in Patient Chart, click the Clinical Notes button
 on the toolbar.
 - Next, click the Template Setup icon on the right panel.
3. In the Template Setup dialog box, click New Template…
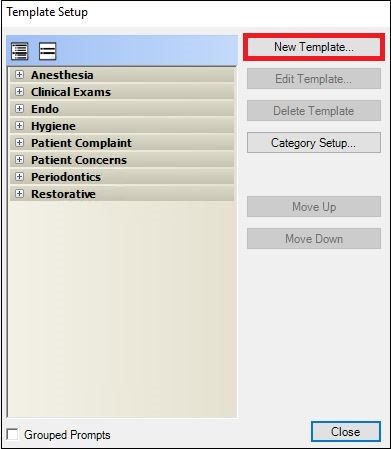
This opens the New Clinical Note Template dialog box, where you will create your template.
4. Since we’re setting up a template for new patient exams in this example, from the Category list, select Clinical Exams.
5. In the Template Name field, type New Patient Exam.
6. In the Clinical Note Text field, type Patient was seen for a new patient exam. and then add a new line (by pressing Enter on your keyboard).
7. Type the first question words, Images taken, followed by a colon and space. Note: It’s important to add the space after the colon so that, when you insert your prompt, there is a space between the end of the question text and the beginning of the text that is inserted from the prompt.
8. Add the other lines of text you will need in the clinical note for a new-patient exam.
You’ve just entered the note text that won’t change when you create a new-patient exam clinical note. Now we can start creating the prompt text that changes every time you use the template. Let’s insert a prompt where each set of information should be added to the note.
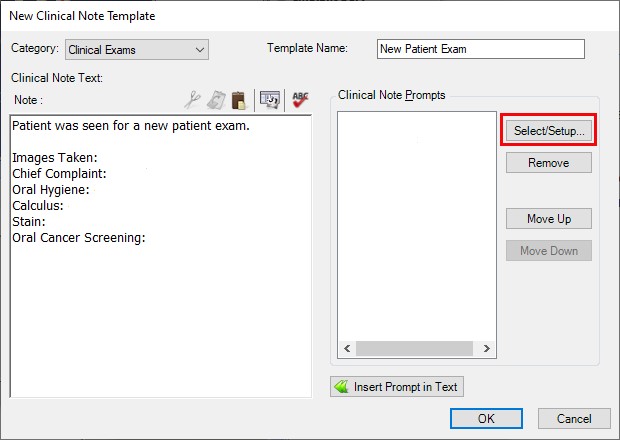
9. Make sure your cursor is placed after the colon and space on the “Images taken:” line, and click Select/Setup to display the Clinical Note Prompts dialog box. There is a list of predefined prompts that you can use.
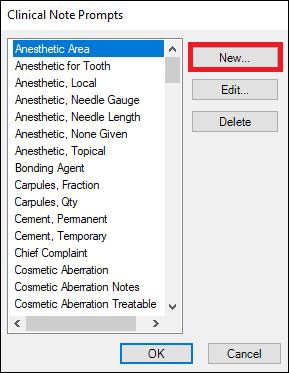
10. We want to add a new prompt that reads “Images Taken.” To create a custom prompt, click New, and then type Images Taken in the Prompt Name field.
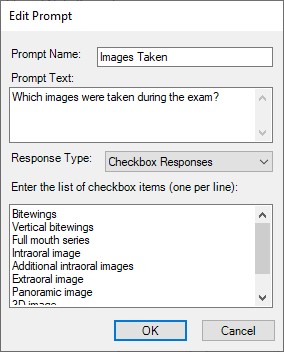
11. The Prompt Text is the text that will appear on the screen while you are creating the clinical note and will be inserted into the note at each designated spot. In the Prompt Text box, type What images were taken during the exam?.
12. The Response Type list provides various types of answers. In this case, since multiple answers are possible, choose Checkbox Responses. Enter all the possible answers that could come up for this question, one answer per line.
13. When finished, click OK.
14. Back in the Clinical Note Prompts dialog box, select the new Images Taken prompt from the list, and then click OK. The prompt will be added to your template.
15. Now that the new prompt is created, you can add it to your note text. With your cursor after “Images Taken: ” in the Clinical Note Text field, click Insert Prompt in Text.
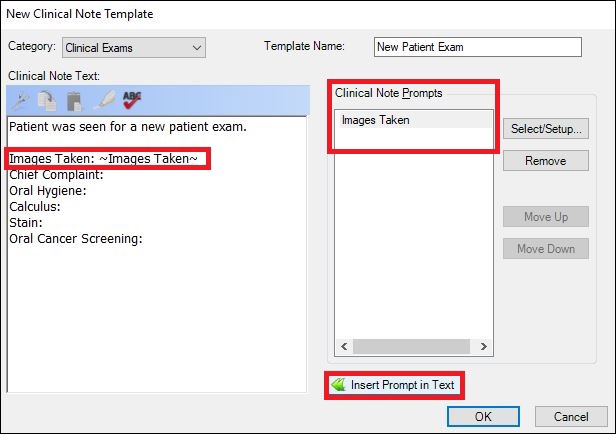
The prompt will be added to the template where your cursor was. You can always identify where a prompt is in the note text because the name of the prompt is enclosed in tildes (for example, ~Images Taken~).
16. Add the other prompts, questions, and answers by following steps 9-15 for each of the lines of clinical note text. When finished, click OK and then Close.
Using the New Template
Your template is now ready to use, and you can find it under the Clinical Exam category in the clinical note templates list.
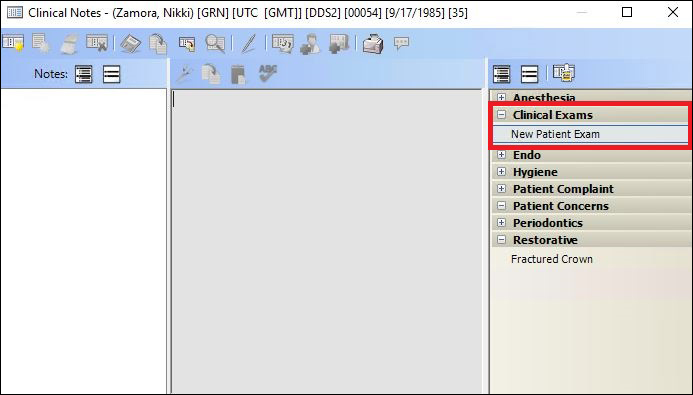
1. To use the new custom clinical note, click the New Clinical Note button ![]() , click OK on the dialog box with the date and time, and then double-click New Patient Exam. The first prompt appears.
, click OK on the dialog box with the date and time, and then double-click New Patient Exam. The first prompt appears.
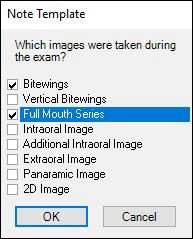
2. When you finish responding to the prompts, your completed clinical note will appear in the Patient Chart with the custom answers that you have chosen.
Now that your template is set up, adding detailed information for a new patient exam is a snap!
Using these steps, you can create other types of clinical note templates, so think about the kinds of notes you use frequently. The next step is to train everyone on your staff to use clinical note templates to improve efficiency, accuracy, and consistency when entering clinical notes.
Additional Information
- For more information, watch this video on creating a clinical note template.
- Attend the Dentrix Enterprise Virtual Workshop A Deep Dive into Clinical Notes to see a trainer-led demonstration of how to manage clinical notes and get a chance to practice. Click here to register now!
- Read Editing and Signing Clinical Notes from the Signature Manager and Adding an Addendum to Clinical Notes for more tips about managing clinical notes.
- To learn more about using Clinical Notes Templates, see the Adding clinical notes and the Creating clinical note templates Help topics.


