Multi-codes make scheduling, charting, and treatment planning faster and easier. Some treatments, even common ones such as a periodic exam, consist of several procedures. Multi-codes are customized groups of procedures together under one code. By adding a multi-code to a procedure button, you can save time on groups of procedures you often post together, such as a prophy and exam or a crown and buildup, as well as ensure all the correct procedure codes are posted.
For your convenience, Dentrix Enterprise includes several pre-defined multi-codes, but you can easily edit these multi-codes or create your own based on the types of procedures your office routinely completes.
To learn more about using multi-codes, check out the blog post on Saving Time With Multi-Codes.
Once created, the custom multi-code can then be selected from the list of procedure code categories when creating an appointment in the Appointment Book, when entering procedures in the Ledger, or when entering procedures in the Patient Chart.
To Add a Multi-Code to a Procedure Button Set
- In the Patient Chart, from the File menu, click Setup Procedure Buttons.
- From the Select Template list, select a template or Custom.
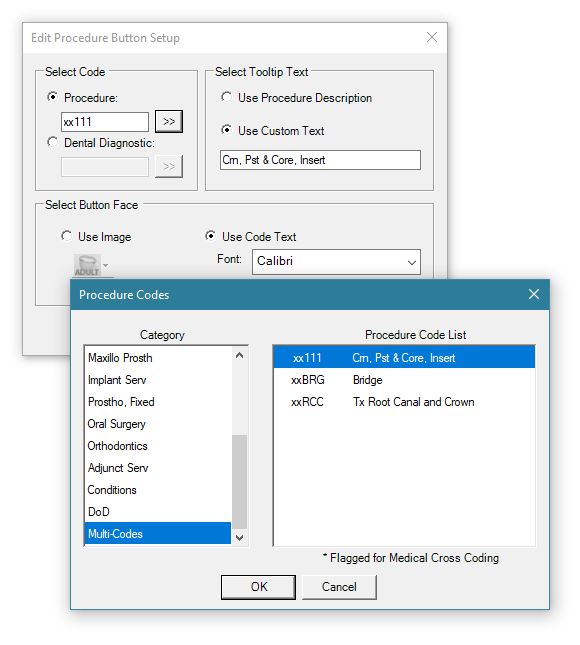
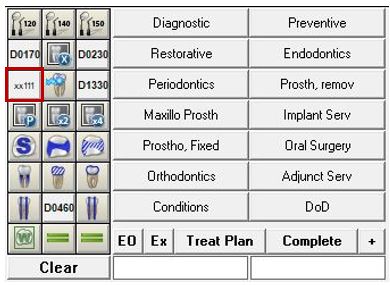
- Click a procedure button to customize it into a multi-code button.
- Click the Procedure search button >>, and select Multi-Codes, select a multi-code, and then click OK.

- Under Select Button Face, change the button face as necessary. You can either select a pre-defined image or use code text.
- Click OK.

Now you are ready to post the multi-code in the Chart.
Additional Information
- To view a list of pre-set multi-codes in Dentrix Enterprise, see the Multi-code setup Help topic.
- For specifics on how to create, edit, or delete a multi-code, see the Adding and editing multi-codes Help topic.
- To learn how to post procedures from the Ledger, view the Posting procedures using multi-codes Help topic.


