When you create a patient appointment or check a patient in at the front desk, there may be a lot of information that needs to be collected from the patient. Use the checklist at the bottom of the Appointment Information dialog box to make sure you have done everything you need to for the appointment, such as verifying insurance, collecting a co-pay, and updating health history. You can customize this checklist to include any unique tasks that you need to remember to address with each patient appointment.

How To
1. In the Office Manager, from the Maintenance menu, point to Practice Setup, and then click Definitions.
2. In the Definition Type list, select Appointment Check List.
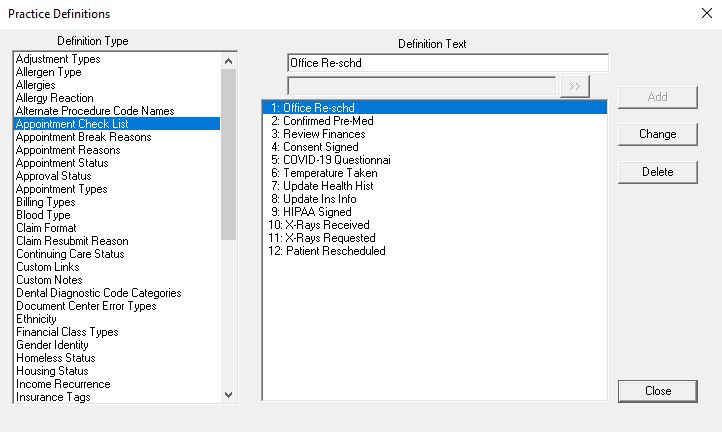
3. In the Definition Text field, enter a checklist item you want to add to the Appointment Information dialog box, and click Add.
You can have up to 12 appointment checklist items in Definitions. If you already have 12 items, you will need to either delete the items you aren’t using or change the text. Keep in mind that changing the text of a checklist item will affect all instances where it has been used in previous patient appointments. Only delete a checklist item if you know that it isn’t assigned to any appointments.
Additional Tips
- The Definition Text field is limited to 20 characters, including spaces.
- Appointment checklist definitions are global settings, meaning they will apply to all users in all clinics.
- In a recent post on the Dentrix Enterprise Blog, we shared ideas on customizing the Appointment Checklist to include COVID-19 tracking protocols.
- To read more, see the Appointment Check List Help topic.


