
Renowned author and inspirational speaker Simon Sinek made popular the phrase, “Start with Why.” Only after we understand Why something is important, do we care about the How. This article explores the reasons behind the newest features in the Dentrix Enterprise 11.0.2 CU4 release— the Why behind these great additions in the latest Dentrix Enterprise 11.0.2 CU4 release. Once we review the Why, we hope you’ll enjoy these tips on How to implement them.
Using the New Insurance Features
Why use the 835 Auto-Calculate feature? If you are an office administrator, you could save time and frustration if you ever deal with insurance overpayments. Some offices spend a lot of time manually sorting out insurance overpayments. The 835 Auto-Calculate feature speeds up your processes by recommending allocation options for insurance overpayments.
How To
- To use the 835 Auto-Calculate feature, activate the 835 auto-post function in the Clinic Resource Setup area in the Practice Setup window.
- Click the Settings tab of the Clinic Information dialog box, and select the ERA Auto Calculate checkbox to auto-calculate payment processes. You can choose to have it post by default or leave it unselected if desired. For more information, see the Dentrix Enterprise 11.0.2 Release Guide section on Overpayments on Electronic EOBs.
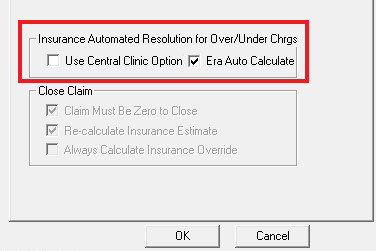
Note: This feature can be activated per clinic or for the entire organization. We recommend that activating this feature be a company-wide decision.
Why use 837i electronic claims? Because using electronic claims frees you from doing manual medical claims, fits better into your eClaims workflow, and gets you paid faster. For hospitals and skilled nursing facilities, submitting medical claims for dental procedures traditionally has required lots of manual work and expense. Manual submissions done outside your dental eClaims software typically take longer to process and are more prone to human error. With the Dentrix Enterprise CU4 update, if you submit medical insurance claims using Dentrix Enterprise eClaims, you get some important benefits. First, you save preparation time by using eClaims instead of paper forms to submit your medical insurance claims. Second, you get paid faster because electronic claims move through the system quickly with fewer errors.
How To
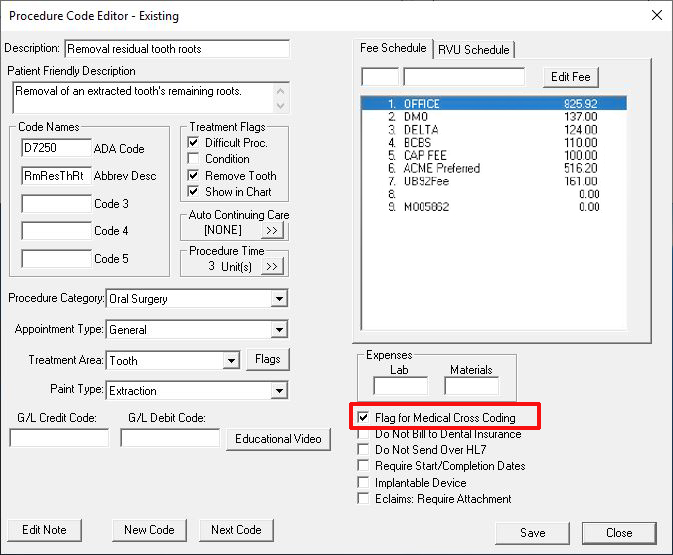
- To submit 837i forms (the electronic version of the UB-04 paper form), you’ll want to make sure your system is set up correctly with the accurate billing provider, rendering provider, and pay-to-provider information. You will also want to review procedure codes and medical cross-coding information and select the Flag for Medical Cross Coding checkbox when you edit any procedure codes by going to Office Manager > Maintenance > Practice Setup > Procedure Code Setup window. For more information, see the Dentrix Enterprise 11.0.2 Release Guide section on 837i.
Setting Up Recurring Payments with AxiaMed
Why use recurring patient payments and card on file charges? For patients, automated recurring payments help them manage and pay down big balances—while getting the treatment they need NOW. Payment plans provide flexibility to meet a patient’s ability to pay. Patients also appreciate the convenience of charging a card on file, saving them time and contact exposure from presenting their card each visit.
As for your practice, anyone who has struggled with manual patient payment plans knows the challenge of getting patients to make timely payments. It’s time-consuming for your team members and it can also result in strained patient relationships, lost patients, bad reviews, or lost referrals. When you set up recurring payments through AxiaMed, your team members can work on more important activities (rather than play collections agent) and patients have a better experience. Plus, you get paid on time, so your A/R is strong, and you have the cash flow you need for your practice to thrive. As an added practice benefit, AxiaMed’s specialized systems store credit card information using PCI-compliant methods and that keeps you compliant, too.
How To
- Select the Payment Plans tab under Patient Finance to get started. When you create a new plan, choose the options that define the amount, duration, and type of payments. When you select the procedures to bill, you can choose to use an existing card on file or click Add Card to set up a new one.
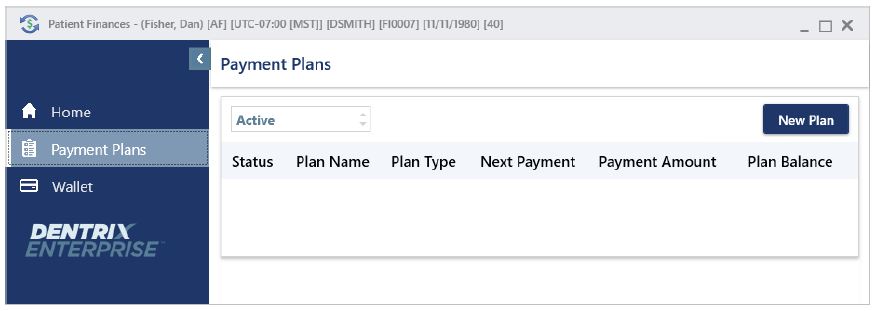
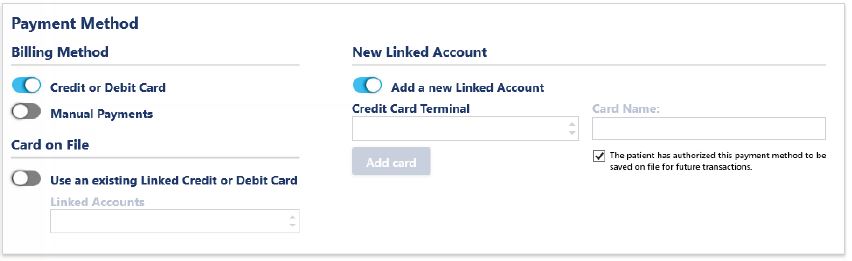
Note: Credit card details are stored by AxiaMed and not in Dentrix Enterprise.
Resizing Windows
Why resize software windows? Because personalization matters, this feature allows you to adjust and customize the system to fit your needs and not the other way around. This added ability lets you pick the window size that is most efficient for you without resetting it every time you log in. Optimal screen settings help you get your optimal work done.
How To
- To resize the Perio Chart, More Information, Medical Alerts, Signature Manager, and Treatment Request Manager windows to the desired size, with your mouse, click and drag the bottom right-hand corner of the window. When you resize the module windows on your workstation, the system will “remember” your window size preferences automatically the next time you log in.
Copying Medical Alerts to Clinical Notes
Why have medical alerts automatically inserted into clinical notes? Because you want to protect patient safety while saving time. Now you can automatically copy a list of the patient’s active problems, allergies, and medications (PAM) into a clinical note. Adding medical data automatically ensures it is not overlooked during current treatments, and that the data is accurate when you come back to that patient’s clinical notes in the future. Plus, automatically inserting the medical data saves a boatload of time versus entering it manually.
How To
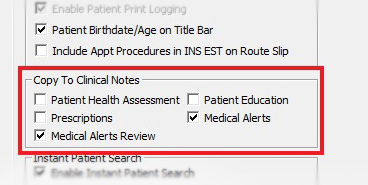
- To copy medical alerts directly to clinical notes, go to Office Manager > Maintenance > Practice Setup > Clinic Resource Setup. Under Clinic Information, click Edit and then click the Optional Settings tab.
- In the Copy To Clinical Notes area, select the Medical Alerts checkbox and click OK.
Note: The More Information window and the Medical Alerts window also include the ability to review medical alerts for a patient.
Charting Surfaces on Multiple Teeth
Why would you want to chart multiple teeth at once? Because to make your practice goals, you need velocity (speed of operations). Over the course of a year, providers see tens or hundreds of thousands of teeth. With that many teeth to monitor and track, a faster way to document multiple teeth at once builds velocity, and the time savings can add up, maybe even increasing the number of patients you can see over the year.
How To
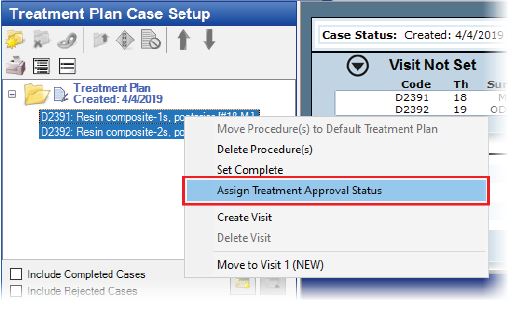
- In the Chart, select a procedure that requires a surface to be selected, click Treat Plan, and mark the surfaces to be treated for each tooth. You can Add selected surfaces to one tooth or click Apply to all teeth.
Here’s hoping these Whys and Hows of updating to the Dentrix Enterprise CU4 release can help you move your practice forward to greater success. For help scheduling your upgrade, contact Dentrix Enterprise support by phone at 800-459-8067, Option 2, or by email at [email protected].


